Lesson 10: Road Salt Alternatives
At this point in the unit, students understand both sides of the road salt story. Salt helps keep people safe in winter, but it also has real impacts on stream ecosystems. Now it’s time to ask the next question: What can we do about it?
In this lesson, students explore practical solutions. They test alternatives to road salt and think about how different materials improve safety—either by melting ice or increasing traction. As they collect data, they begin to see that no single solution is perfect. Some materials work well but are expensive. Others are cheap but less effective. Some are great at increasing traction but have no impact on melting. Some reduce environmental impact but may not be realistic at larger scales.
Students use their data on melting, traction, cost, and environmental impact to make a decision about which alternatives make the most sense in different contexts. This is not about finding one “right” answer—it’s about weighing trade-offs and using evidence to support a claim.
The lesson then shifts from materials to systems. Even when better choices are made, snowmelt still carries materials into streams. Students revisit their schoolyard using Model My Watershed to explore how design decisions—like adding rain gardens or porous surfaces—can reduce runoff and protect local waterways.
Throughout the lesson, the focus stays on action. Students are not just identifying problems—they are testing solutions and thinking about how change can happen in their own community.
Materials:
Materials provided in the :
- Activity 1: Clear plastic cups, Smaller “Dixie” cups to distribute salt alternatives
- Activity 1: Teaspoons (reuse from Lesson 5), Timers (reuse from Lesson 3), Markers (permanent markers in Lesson 7)
- Activity 1: Items to test
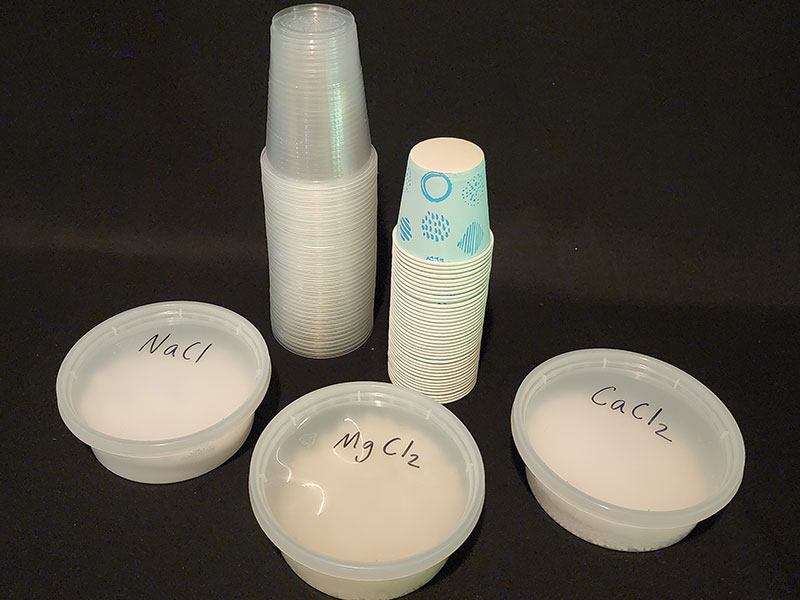
- Solid Salts: Sodium chloride - NaCl (the most common deicing road salt to use as a control), Magnesium chloride - MgCl2 , Calcium chloride - CaCl2
- Solutions: Beet juice
- Solids: Sand (reuse from Lesson 5), Coffee grounds
Materials you will need to gather:
- Lesson Slides
- Activity 1: Student Handout: Road Salt Alternatives Data Sheet
- Activity 1: Ice cubes
- Optional items to test: Brine (23% NaCl solution), Pickle juice
Learning Objectives:
At the completion of this lesson, students will be able to:
- Quantify the relative effectiveness of alternatives to road salt. STEELS Standard(s): 3.5.6-8.C, 3.5.6-8.H
- Determine the best road salt alternative and support your claim for why it is the best. STEELS Standard(s): 3.3.6-8.M, 3.5.6-8.C, 3.5.6-8.G
- Model stormwater runoff and best management practice (BMP) applications to make recommendations to reduce runoff in the schoolyard. STEELS Standard(s): 3.3.6-8.M, 3.5.6-8.G, 3.4.6-8.H, 3.5.6-8.C
Activities:
Activity 1 Preparation
Safety Note: Use standard classroom safety practices during this activity. Students should not eat or taste the materials and should avoid direct skin contact. Everyone should wash hands after handling materials, particularly the salts. Gloves and safety glasses are recommended when working with magnesium chloride and calcium chloride. Follow your district’s guidelines for material use and disposal.
Preparing Brine: Road salt brine is about 23% sodium chloride. Mix 300 grams of table salt (NaCl) with 1 liter of water—warm water helps it dissolve more quickly. Prepare ahead of time so it can cool to room temperature before use. Some undissolved salt is fine.
Melting Experiment: You will need ice for each group along with a control cup of plain ice. A bag of ice saves prep time. Each group should have one control and one to three alternative materials depending on how you organize the activity.
Traction Experiment: Freeze an ice cube tray for each group. These trays allow students to compare how different materials affect traction on a consistent surface.
In this activity, students take a closer look at alternatives to road salt by focusing on two key questions: How does this material improve safety on ice? and How well does it perform compared to traditional road salt? Students test a range of materials for both melting and traction. As they work, they begin to see that materials don’t all solve the problem in the same way, and that there are trade-offs with every choice. Using their results along with information about cost and environmental impact, students use a decision matrix to decide which options make the most sense for keeping people safe in winter.
Melting Experiment
Road salt helps to melt ice. In this activity, students test other materials to see if they can also melt ice, and how well they perform compared to traditional road salt.
Before class, prepare the test materials by placing each material into individual small Dixie cups for each lab group. Each group should receive one cup of each material they will test (3–5 materials total) along with clear plastic cups, ice, and one control cup containing only ice. Students use the Road Salt Alternative Worksheet to guide their work and record observations.
Students label a clear plastic cup for each test material and one additional cup as the control, then add two ice cubes (or ½ cup of crushed ice) to each cup. For solid materials, add approximately one teaspoon. For liquid solutions, transfer approximately 30–45 mL (about half of a small Dixie cup). Encourage students to spread or pour the material so it makes good contact with the ice.
Students observe the cups for 10 minutes, recording changes throughout rather than waiting until the end. Encourage them to look for patterns—how quickly melting begins, whether the ice becomes pitted, smooth, or cloudy, and whether the material dissolves or remains visible. At the end, students compare how much ice has melted in each cup and rank the materials from most to least effective.
Traction Experiment
In this part of the investigation, students shift from thinking about melting to thinking about traction. Some materials do not melt ice effectively but can still make surfaces safer by increasing grip.
Students remain in their small groups and use the same prepared materials from the melting investigation. Provide each group with a frozen ice cube tray as the testing surface. Students assign one ice cube compartment to each material and leave one compartment untreated as the control. Solid materials should be lightly sprinkled onto the ice; liquid solutions can be applied with a dropper to ensure consistent amounts.
After applying the materials, students gently press or slide their fingers across each compartment to compare traction. Encourage them to describe the feel using words such as slippery, rough, gritty, or sticky and to support their rankings with evidence from their observations. Students record findings on the Road Salt Alternative Worksheet and rank materials from most to least effective at improving traction.
Cost Analysis and Environmental Impact
Students now use the cost data provided on the worksheet to evaluate each material, ranking from lowest to highest cost and lowest to highest environmental impact. This step helps students move beyond performance alone and begin considering real-world constraints, where cost and environmental impact play an important role in decision-making.
Discussion
At this point, students have explored melting, traction, cost, and environmental impact. Have students use the Cost–Benefit Matrix on the worksheet to evaluate each material, ranking each one across all four categories and calculating a total score.
As students work, encourage them to go back to their data. Which materials worked best for melting? Which improved traction? Are those the same materials? There isn’t a single “right” answer here, and groups may come to different conclusions. Push students to consider context: where might different materials make the most sense? Sand or coffee grounds might work well on a sidewalk or steps, but not at the scale of a roadway. Have groups share and defend their choices using evidence from their data.
In Activity 1, students identified materials that may work better than traditional road salt. However, even the best alternative does not stay on the road. As snow and ice melt, water carries dissolved materials into storm drains, streams, and groundwater. Improving the material is only part of the solution—we must also think about where the water goes.
This activity shifts students from selecting better road salt alternatives to designing landscapes that reduce polluted runoff. Even environmentally preferable materials can negatively impact waterways if they are washed into streams in large quantities. Whether the runoff contains sodium chloride, magnesium chloride, beet juice, or another deicer, reducing runoff and increasing infiltration helps protect watershed health.
Using Model My Watershed®, students investigate how stormwater moves across their schoolyard and explore how changes to the landscape can reduce runoff. They will model the installation of Conservation Practices—such as rain gardens, porous pavement, green roofs, and tree plantings—to examine how these features increase infiltration, reduce runoff, and improve watershed health.
Students use the step-by-step instructions and begin by locating their school in Model My Watershed and examining the existing conditions. Using the Analyze panel, they record information about the selected area including the three largest land cover types and the dominant soil group. Revisit the concepts of infiltration and runoff introduced in Lesson 4 by asking: When it rains or snow melts, where does the water go? Which surfaces allow water to soak into the ground, and which cause it to run off?
Students then use the modeling tools to add conservation practices to their schoolyard. As they experiment with different combinations, they observe how each change affects runoff, infiltration, and evapotranspiration, recording results on their worksheet. Encourage students to compare scenarios and look for patterns rather than searching for a single “correct” design.
To conclude the activity, students use their findings to develop a schoolyard watershed improvement plan. Their design should recommend the conservation practices they believe will most effectively reduce runoff while remaining practical for the site. During the discussion, encourage students to justify their decisions using evidence from their model, considering factors such as locations where runoff is greatest, areas where water already pools, the intended use of different parts of the campus, and the feasibility of implementing specific conservation practices. This reinforces an important engineering principle: effective environmental solutions must balance scientific evidence with real-world constraints.
Adaptations & Extensions:
Activity 1: Try the Alternatives
If this lesson is being conducted over the winter during freezing temperatures, get permission from the school to try out these alternatives outdoors. Have students observe each alternative in action to see which seems more functional. Have them talk with other students, teachers, or anyone else using the sidewalks and take a poll on which material is preferred.
Activity 2: Schoolyard Land Use Mapping
Before introducing Model My Watershed, provide students with a printed topographic map of the schoolyard or campus. If possible, take the class outside and have students compare the map with the landscape around them. Encourage them to identify high and low areas, hills, slopes, and places where water might collect after a rainstorm. Working in small groups, students use contour lines and elevation information to predict the direction water would flow and draw arrows on the map showing predicted runoff pathways. After returning to the classroom, students compare their predictions with the elevation and flow patterns displayed in Model My Watershed. Conclude by discussing how elevation influences runoff and why understanding topography is an important first step in managing stormwater.
Assessment:
-
Exit Ticket
Based on your testing and data, which material would you recommend as the best alternative to road salt? Use data to support your answer.
-
Trade-offs
What trade-offs did you have to consider when making your recommendation?
-
The Remaining Problem
Even if we choose a better material, what problem still remains when snow melts?