Lesson 3: Walk Around the Schoolyard
In this lesson, we will explore how the surface cover of the land impacts where the water goes when it rains by identifying pervious and impervious surfaces in our schoolyard. Next time there is a heavy rainstorm, look out the window and watch where the water goes. And if you’re lucky enough to have a heavy rainstorm while you are at school, be a careful observer and watch where the water travels after it hits the ground. For example, is there an area in the parking lot where puddles form, or does a small "river" of water run across the outdoor basketball court? Many built surfaces are quite impervious to rainwater. Impervious means that liquid cannot pass through, and an impervious surface is any solid surface that will not allow water to penetrate. Impervious surfaces are constructed to make life easier. As a society, we rely on roads, parking lots, sidewalks, buildings, basketball courts, etc., but these impervious surfaces also contribute to various problems, including increased runoff and pollution. When rain falls on impervious surfaces, instead of soaking into the ground and recharging the groundwater, the rain runs over impervious surfaces, picking up sediment and pollution, which can quickly end up in our local streams and rivers. When water runs over the surface instead of infiltrating into the ground, we call this runoff. An increase in runoff can also lead to increased flooding as more water goes to the stream instead of infiltrating into the ground; this can erode stream banks and harm the organisms that live in the stream.As students explore their own schoolyard, they'll begin to see it through a new lens; not just as a place to learn and play, but as part of a watershed where every drop of rain has a journey.
Materials:
Materials provided in the :
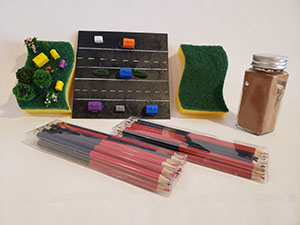
- Activity 1: Pervious/Impervious Demo- sponge meadow model, sponge town model, paved road model, and a small container of cocoa powder
- Activity 2: 25 blue-colored pencils, 25 red-colored pencils
Materials you will need to gather:
- Lesson 3 slide show
- Activity 1: Tray, spray bottle, 1-Liter measuring cup (from lesson 2 kit)
- Activity 2: 25 copies of your schoolyard map (e.g., Millersville University)
- Activity 2: 25 clipboards or something hard to write on when walking outside
Learning Objectives:
At the completion of the lesson, students will be able to:
- Describe the impact of impervious surfaces on where the water goes when it rains.
- Identify pervious and impervious surfaces in their schoolyard.
Activities:
This lesson begins with demonstrating pervious and impervious surfaces. Before class, gather the three models from your kit. To begin, show the Lesson 3 PowerPoint and display the slide with the image of a meadow. Then hold up the green and yellow sponge and explain that it is a model of a meadow. Ask students, "What happens to the water when it rains in a meadow?" Probe student thinking and work to get to the idea that water seeps into the ground (use the term - infiltration). Use a spray bottle to make it rain on the sponge. The water infiltrates into the ground because the ground is a pervious surface. This is good because water infiltrates into the ground and recharges our groundwater. This process means our water wells won't run dry!
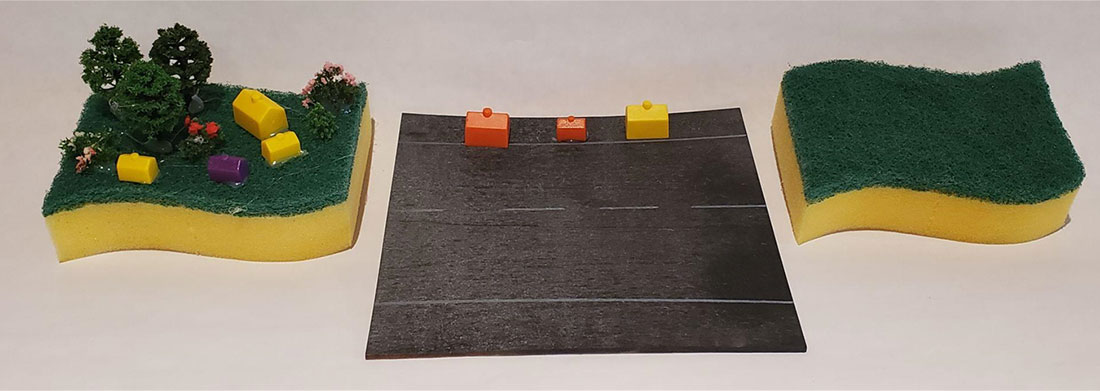
Next, show students the sponge town and paved road model. (Show the image from the PowerPoint of the meadow, the town, and the urban city.) The sponge town represents a town with many green spaces, and the paved road represents a city with lots of pavements and few green spaces. What happens if it rains in the town versus the paved road in the urban city? Make it rain on each model. The goal is to help students understand that green spaces are pervious surfaces where water can seep into the ground. Parking lots, roads, and roofs are impervious surfaces, and water cannot pass through impervious surfaces. Water that falls on impervious surfaces runs off the surface into the nearest stream.
Now sprinkle cocoa powder over both models. Explain that the cocoa powder represents pollutants, such as oil dripping from cars, fertilizer, pet waste, or trash. Ask students, "What happens to these pollutants when it rains on pervious versus impervious surfaces?" Spray both models with water. (Tip: Hold the models at a slight angle so the water flows off the surface of the impervious model.) Students will see from the model that the water picks up the cocoa powder and carries it across the surface. Connect this back to the crumpled watershed activity from Lesson 2 by asking, "Where did all the water end up in our model watershed?" Help students make the connection that runoff carries pollution across the land and can eventually end up in nearby streams and rivers?
Possible Adaptations:
If you have access to one, this activity can be completed using an Enviroscape model.
In this activity, you will lead students on a “watershed walk” of their school yard. During the walk, they will identify areas of pervious and impervious surfaces and use what they have learned to predict where rainwater will flow during a storm.
Provide each student with a schoolyard map (created using the default view on Google Maps), along with a red and a blue colored pencil. Before heading outside, project a satellite view of your schoolyard from Google Maps to help students orient themselves. On their maps, have students sketch and label major features such as the property boundary, playground, baseball field, parking lot, sidewalks, etc.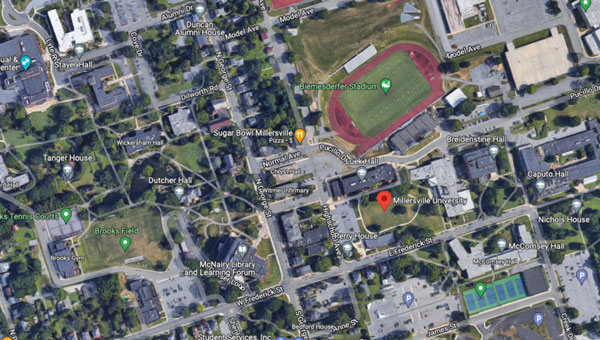
Satellite View
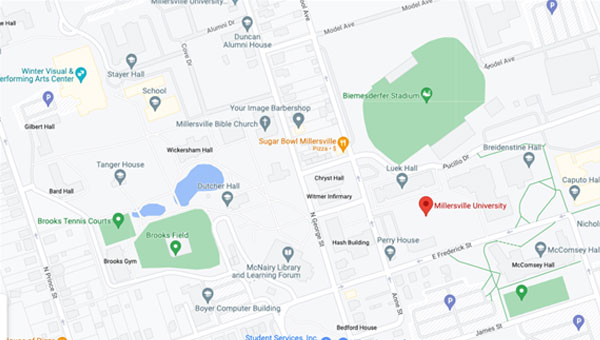
Default View
As you head outside, have students color impervious surfaces red and pervious surfaces blue. Encourage them to think about what happens to water when it rains on each type of surface. Explain that water can infiltrate into the ground on pervious surfaces, helping recharge groundwater and reduce flooding. On impervious surfaces, water cannot soak into the ground, so it flows across the surface as runoff.
As students identify impervious surfaces, ask them to draw arrows on their maps showing where they predict the runoff will flow after a heavy rainstorm. Encourage them to think about the slope of the land and where the water will eventually end up. Ask questions such as:
- Where do you think the water will go after it leaves the parking lot?
- Will the water soak into the ground or continue flowing across the surface?
- Where do you think puddles might form?
As you continue the walk, look for storm drains near impervious surfaces and explain that they are designed to collect and move runoff away from roads and parking lots. Depending on your schoolyard, point out other features that help manage stormwater, such as rain gardens, retention basins, swales, or wooded areas. Discuss how each of these features affects where water goes when it rains.
Possible Differentiation Adaptations:
For activity 2, some students might struggle to connect their physical surroundings to the line drawing on the provided map. To assist these students, consider giving them a color satellite image of the map. This color version of the map can help them identify their "place" on the map and make distinguishing between pervious and impervious spaces easier.
Possible Extension:
You can also ask your school’s facilities manager to lead the tour. They are the local experts who can talk about how the school property is intentionally designed to manage stormwater.
Assessment:
When you return to the classroom, ask students to answer the following prompts on the back of their map.
- Make a list of the impervious and pervious surfaces you found in your schoolyard.
- When water falls on your schoolyard, does it mostly infiltrate or runoff? Use the map you created to support your answer.
*Use this assessment and a completed schoolyard map to create an anchor chart summarizing students' learning.
Reading Connection:
Nagelhout, R., 2014. Saving the Chesapeake Bay. 1st ed. New York: Gareth Stevens Publishing.