Lesson 5: Modeling Changes to the Schoolyard
Lesson 5 builds on what students learned in Lesson 4 about runoff. They discovered that land cover, soil type, and rainfall all influence where water goes when it rains. Now it's time to ask an even bigger question: How have people changed the land, and how can we make better choices for our watersheds?
We begin by taking a trip back in time. Long before roads, schools, parking lots, and neighborhoods existed, Indigenous peoples lived on and cared for the land where your community is today. Students will use the Native Land website to discover who has called this place home throughout history. Then they'll imagine what their community may have looked like hundreds of years ago and compare it to the community they know today.
Over time, technological innovation and development have changed the way we use the land. We need homes, schools, roads, parks, and businesses for our communities to thrive, but those changes also affect how water moves across the landscape. Students will revisit what they learned in Lessons 3 and 4 to think about how replacing forests and fields with impervious surfaces changes runoff.
The good news is that development and healthy watersheds don't have to be opposites. Engineers, planners, landscape architects, and conservation professionals have developed creative ways to reduce runoff while still meeting the needs of our communities. Students will explore several of these conservation practices before using Model My Watershed® to redesign their own schoolyard.
Model My Watershed® is a professional GIS application developed by the Stroud Water Research Center. The same tool is used by educators, scientists, conservation organizations, land use planners, municipal decision-makers, and community members to better understand how land use affects water quality and stormwater runoff. Students will use the Site Storm Model to investigate their schoolyard, test different conservation practices, and discover how thoughtful design can reduce runoff and create healthier watersheds.
* Instructional Video to walk you through how to use MMW.
Materials:
Materials provided in the :
- Activity 2: Conservation Practice Fact Sheets
Materials you will need to gather:
- Lesson 5 slide show
- Activity 1: computer/tablets and 25 copies of Past and Present Worksheet
- Activity 3: 25 copies of the Model My Watershed Handout and Computer/tablets
Websites:
Learning Objectives:
At the end of the lesson, students will be able to:
- Recognize the indigenous peoples who have inhabited the region both historically and in contemporary times.
- Examine the impact of human activities on the watershed.
- Describe conservation practices that can reduce runoff.
- Propose ways to improve our watershed.
Activities:
Have students navigate to native-land.ca and click Open Street Map Labels in the bottom right corner of the map to display current roads and towns. Enter your school's address in the search box to locate your community and identify the Indigenous territories where your school is located.
Next, hand out the Past and Present worksheet and art supplies. Have students begin on the Past side by imagining what the area around their school may have looked like about 600 years ago. Encourage them to include plants, animals, streams, and other natural features, then write a sentence describing their drawing.
Now shift to the Present side of the worksheet. Explain that over time, advances in technology have changed how we use the land. Ask students, "Today, what does a community need for people to live happy, healthy, and productive lives?" Homes? Schools? Parks? Stores? Roads? Have students draw what they think an ideal community looks like today and write a sentence describing it.
When everyone has finished, invite students to compare their two drawings. What stayed the same? What changed? How might those changes affect the way water moves across the landscape?Begin by asking students to think back to the runoff simulation in Lesson 4. What type of land cover created the least runoff? Students should remember that natural land covers, such as forests and meadows, allowed more water to soak into the ground and produced less runoff.
Next, have students take out the schoolyard maps they created in Lesson 3. Remind them that the red areas on their maps represent impervious surfaces that contribute to runoff. Ask, "If we wanted to reduce runoff around our school, what changes could we make?" Students will likely suggest replacing pavement with grass, forests, or other pervious surfaces. This is a great opportunity to point out that while natural land cover is best for reducing runoff, communities also need schools, roads, sidewalks, parking lots, playgrounds, and other developed spaces. The goal isn't to get rid of these features; it's to make them work better for our watershed.
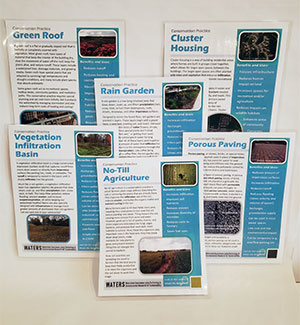
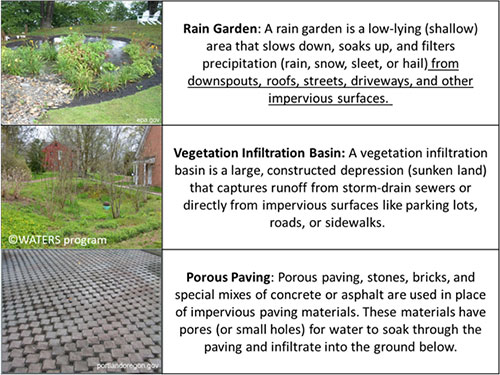
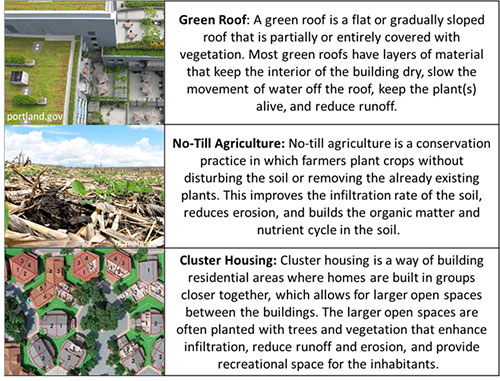
Explain that engineers, planners, and conservation professionals have developed creative ways to do just that. These "better choices" are called conservation practices. For example, parking lots can be built with porous pavement that allows water to soak into the ground. Rain gardens can capture runoff from roofs and sidewalks. Green roofs, tree plantings, and native meadows all help slow down runoff and increase infiltration. Use the conservation practices fact sheets to introduce each practice and discuss how it helps protect the watershed. Tell students they'll have a chance to test many of these ideas in the next activity using Model My Watershed®.
Conservation Practices:
It's time to put everything students have learned into action. In this activity, students become land use planners. Their challenge is to figure out how to improve the schoolyard by testing different conservation practices and discovering which changes reduce runoff and increase infiltration.
Begin by introducing the challenge: "Today, you're the land use planners. Your job is to redesign our schoolyard to make it better for both people and the watershed."
Open Model My Watershed® and guide the class through the Site Storm Model using your school as the study site. Explain that this is the same professional modeling tool used by scientists, engineers, land use planners, conservation organizations, and communities to explore how changes to the landscape affect stormwater runoff and water quality.
As students explore the model, encourage them to think back to the schoolyard maps they created in Lesson 3 and the conservation practices they discussed in Activity 2. Where are the biggest runoff problems around your school? Which conservation practices would make the biggest difference?
Have students record their observations on the Model My Watershed Handout as they test different ideas. Encourage discussion throughout the activity. Did everyone's design produce the same results? Which conservation practices had the biggest impact? Which changes seemed the most practical for your school? Remind students that there isn't one perfect solution. Real land use planners balance the needs of people with the needs of the environment. Their goal is to design a schoolyard that works well for both.
Instructional Video to walk you through how to use MMW.
Step by Step summary of MMW directions:
- Visit the Model My Watershed website.
- Type the location of the school in the address bar.
- On the Layers menu– (under the tab that looks like little sheets of paper), click Satellite with Roads.
- Click on the Green GET STARTED button on the left of the screen.
- Under Draw Area, choose Square KM.
- Put the cursor right over the school location and click. (You can zoom in or out if needed.)
- This shows a square km boundary surrounding the school.
- Choose Model on the left side of the screen.
- Click on Site Storm Model.
- You see a color grid showing Evapotranspiration, Runoff, and Infiltration.
- Click on Add Changes to this Area on the upper right-hand side of the screen.
- Choose different options under the green-colored Conservation Practice and Land Cover buttons at the top of the screen.
- Click on compare to see how your changes compare to the original condition and to a complete forest.
- Download your work and save for use in Lesson 9.
Assessment: Exit Ticket
If you were to modify your home environment, what would you do differently than what you did in your schoolyard?